


Many friends may encounter problems such as distorted screen, white screen, half-screen display, etc. when using our products. When facing these problems, you can first flash the AD board program to confirm whether the cause of the problem is a hardware problem or a software problem;
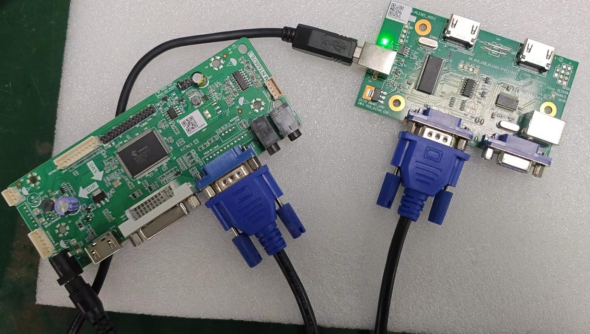
1. Hardware Connection
Connect one end of the VGA cable to the update card interface and the other end to the monitor interface. Ensure the connection is secure to avoid data transmission issues.
2. Driver Signature Enforcement (for Windows OS)
Before flashing, disable driver signature enforcement:
Go to System Settings > Update and Security > Recovery > Advanced Startup > Restart Now.
After rebooting, select Troubleshoot > Advanced Options > Startup Settings > Restart.
Press F7 or number key 7 to disable driver signature enforcement. This allows unsigned drivers to run, which is necessary for the flashing tool.
3. Flashing Tool Setup and Firmware Update
Launch the Tool: Double-click to run the EasyWriter software.
Configure ISP Settings:
Go to Option > Setup ISP Tool.
Select Jig Type Option as NVT EasyUSB (recommended speed: Mid Speed or Hi Speed).
Enable FE2P Mode and ensure SPI Block Protect after ISP OFF is disabled.
Load Firmware:
Click Load File and select the firmware file (e.g., “NT68676 Demo Board.bin”).
Execute Flashing:
Ensure the board is powered on and connected.
Click ISP ON to activate the connection, then press Auto to start the firmware update process.
Wait for the tool to complete chip erasing and programming. A “Programing Succ” message indicates success.
Finalize:
After completion, click ISP OFF to disconnect. Reboot the AD board to apply the new firmware.
Note: Ensure the firmware file matches the board model (68676) to avoid compatibility issues. Always back up original firmware before updating.

Post time: Jul-17-2025


